Create a portable battery and solar powered Raspberry Pi Zero web server
Learn how to create your own solar-powered Raspberry Pi setup in this tutorial.

I asked the community on Reddit what tutorials people wanted me to write, and one, in particular, caught my imagination. ‘Thaslegendary’ said:
“A guide on how to power raspberry pi zero with 4 AA battery would help me a lot”
This really got me thinking. Can I build a portable web server that runs off battery alone, topped up with a solar panel? There’s only one way to find out. At the time of writing this, the Raspberry Pi Zero is running on a solar power bank and is therefore completely off the grid.
Step 1 – Choose your power supply and hardware

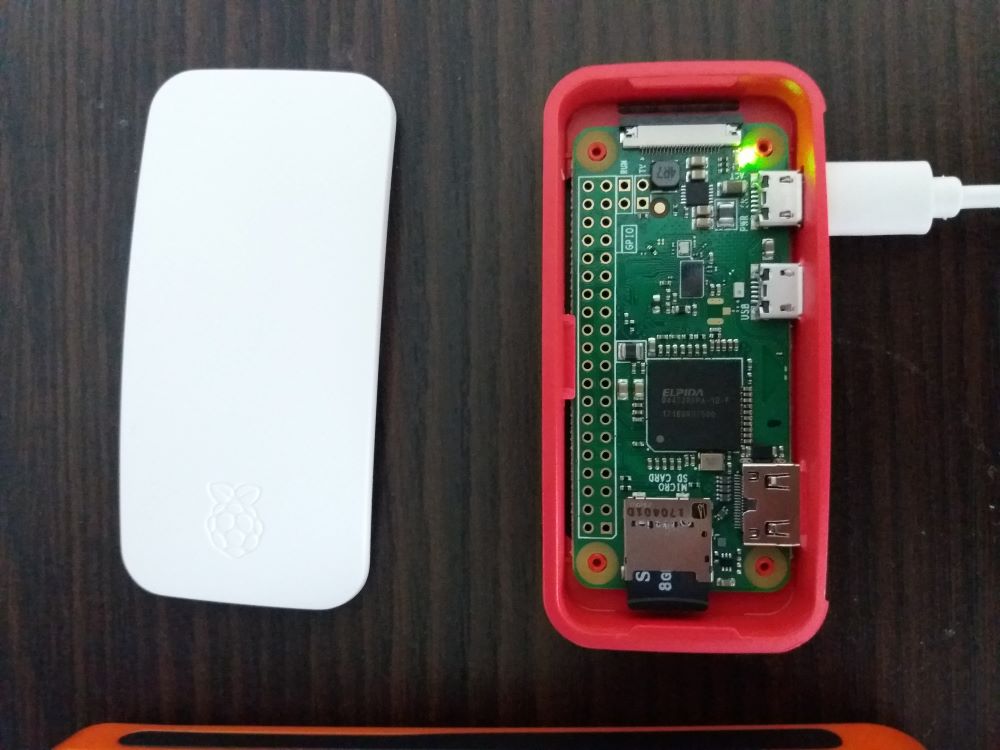
The Raspberry Pi choice had to be a Zero W. According to Jeff Greerling the Raspberry Pi Zero W uses around 0.4w, a super low consumption. The power bank choice was essential too, it had to fulfil the following criteria:
- Has to have at least 10,000Mah battery
- Has to have a solar panel for topping up the charge
- Has to have a USB port capped at 1a to promote longer battery life
I bought an Aisla 20,000Mah power bank off Amazon for £16. Nice capacity, complete with a solar panel for a modest price.

Step 2 – Install Nginx
I’m going for Nginx as the web server for this project. Nginx is lightweight and uses minimal resources. Let’s first ensure that our installation of Raspbian is up-to-date (I’m assuming that your Raspberry Pi Zero is already working and you’re using Raspbian OS and you’ve connected to your Wifi network):
sudo apt-get update -y && sudo apt-get upgrade -y
Now for Nginx installation:
sudo apt-get install nginx -y
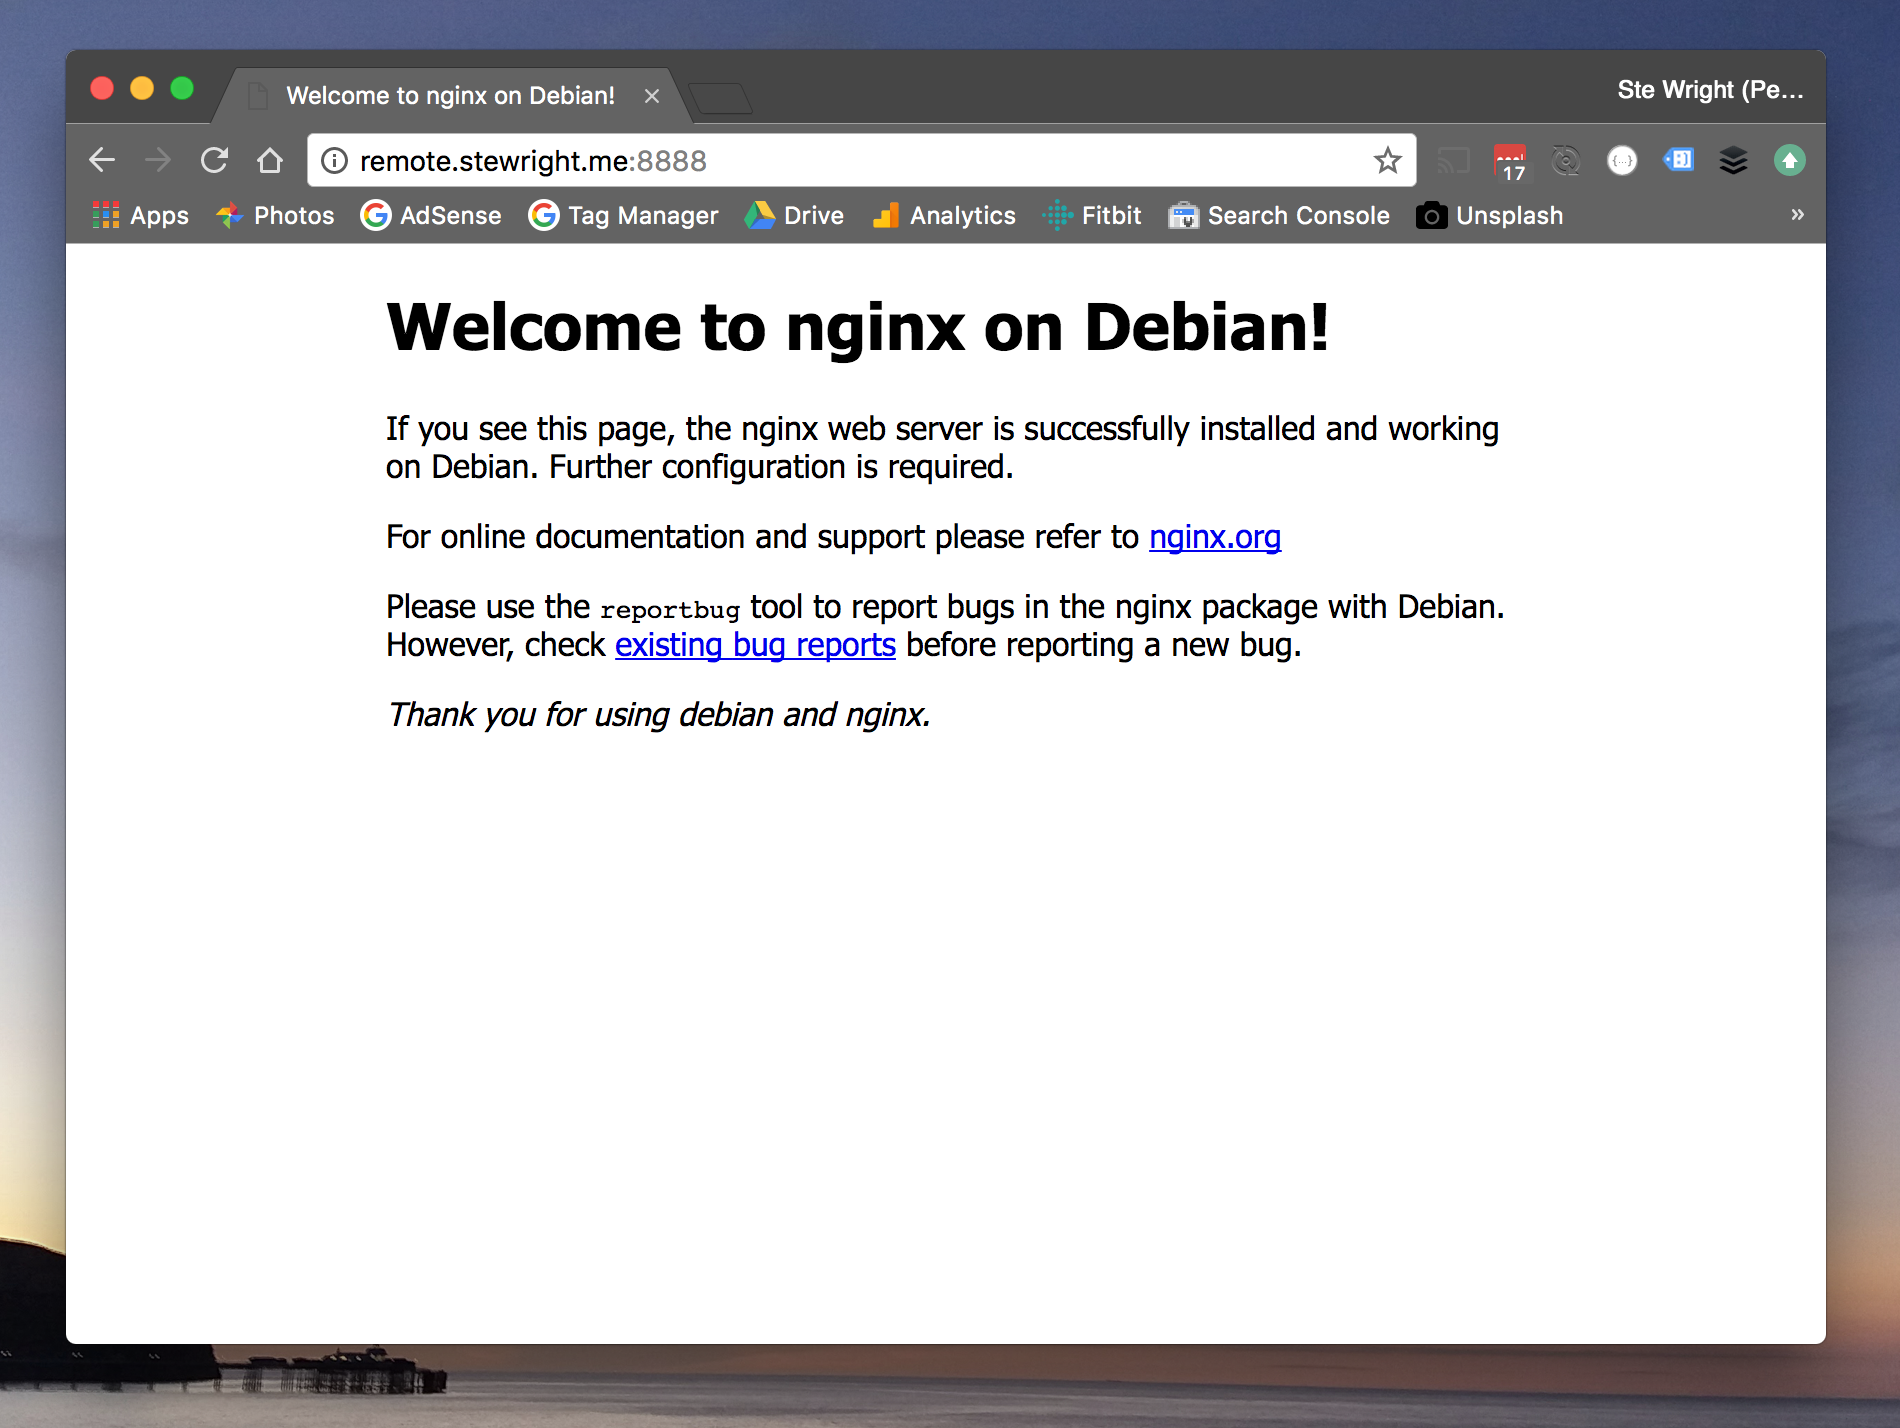
After a short while, Nginx should be installed. Go ahead and visit the IP address of your Raspberry Pi Zero. You should see something a little like this:

So that’s pretty much it for Nginx, add whatever site you want to or even install PHP. Next, we’ll take a look at some monitoring.
Step 3 – Add some monitoring by installing Rpi-Monitor
We will want to know the health status of our Raspberry Pi Zero battery-powered web server. This can be done using a package called Rpi-Monitor. I’m going to talk you through the installation and using Nginx as a proxy to access the monitoring page without an ugly port number.
Rpi-Monitor uses a private Debian repository, so we need to add this first. Install a couple of packages to get started:
sudo apt-get install apt-transport-https ca-certificates
Now we need to add more sources:
sudo wget http://goo.gl/vewCLL -O /etc/apt/sources.list.d/rpimonitor.list
Now let’s install a certificate so we can download from this repository:
sudo apt-key adv --recv-keys --keyserver keyserver.ubuntu.com 2C0D3C0F
At this point, we can install the package. We need to update our lists first so the following command will do both update sources and install the package:
sudo apt-get update && sudo apt-get install rpimonitor
Finally, we need to ensure our updatable packages are updated:
sudo /usr/share/rpimonitor/scripts/updatePackagesStatus.
Try going to your Raspberry Pi Zero’s IP address with the port 8888 and you should see the status page.
Step 4 – Configure the proxy in Nginx
We’re going to proxy our requests to Rpi-Monitor via nginx. This allows us to have our regular web traffic to Nginx and to Rpi-Monitor without an ugly port number on the URL. It also allows us to later add an SSL certificate to our monitoring page (see Adding SSL for free with Let’s Encrypt).
Edit the default site configuration by typing the following command:
sudo nano /etc/nginx/sites-available/default
In the configuration, we will see an entry for ‘location /’. Underneath that location block (so after the closing curly brace) add this:
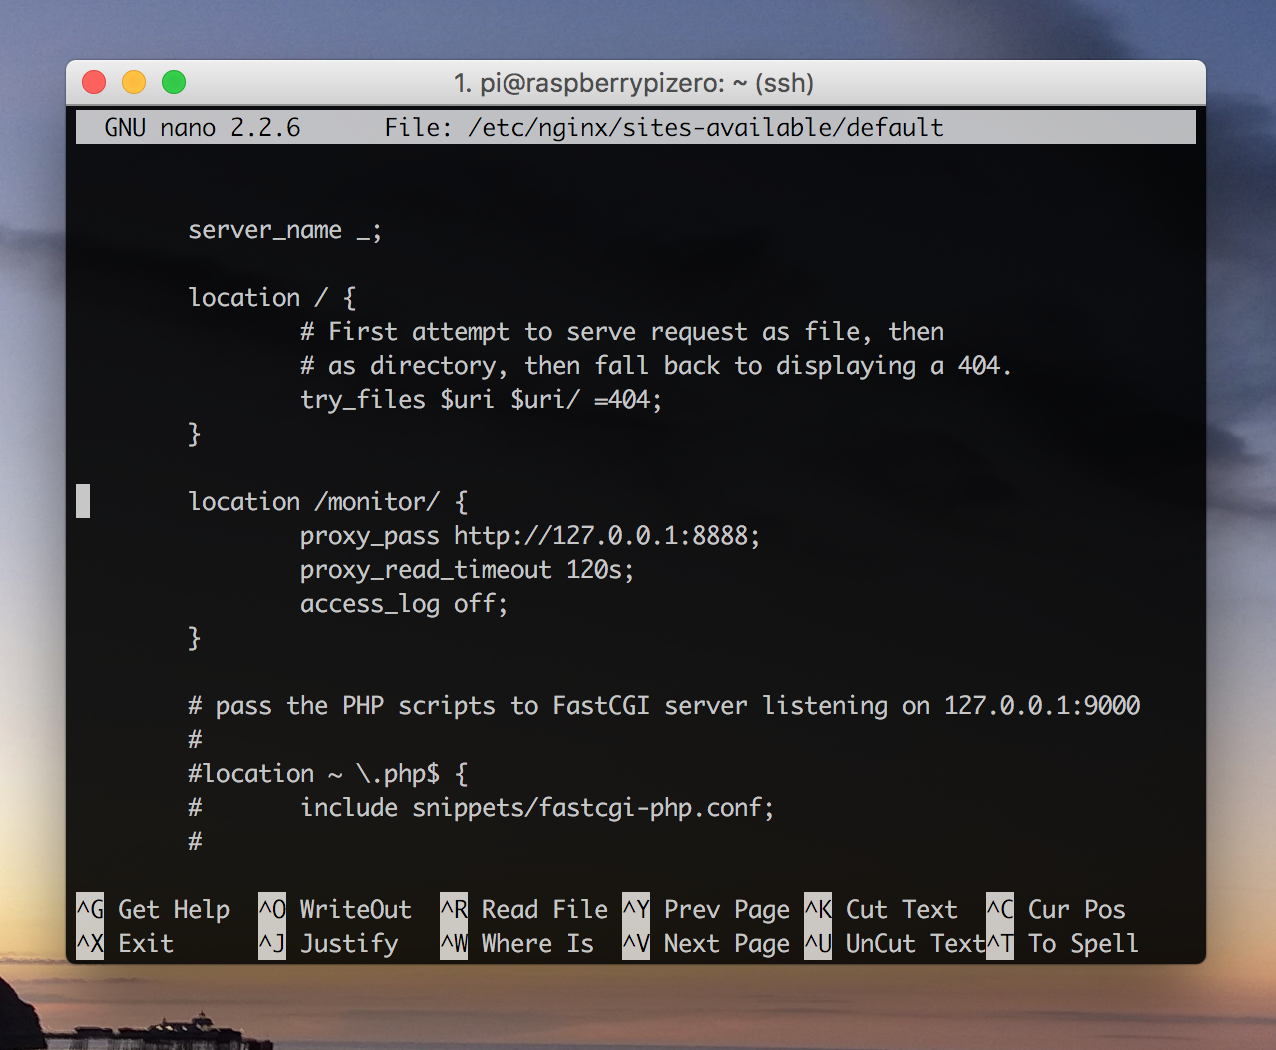
location /monitor/ { proxy_pass http://127.0.0.1:8888; proxy_read_timeout 120s; access_log off; }
This will allow requests to example.com/monitor/ to show Rpi-Monitor. Your configuration will now look a little like this:

Exit and save by hitting CTRL + X. Finally, test that your configuration isn’t broken by typing the following command:
sudo service nginx configtest
You should have an OK message. Go ahead and restart Nginx:
sudo service nginx restart
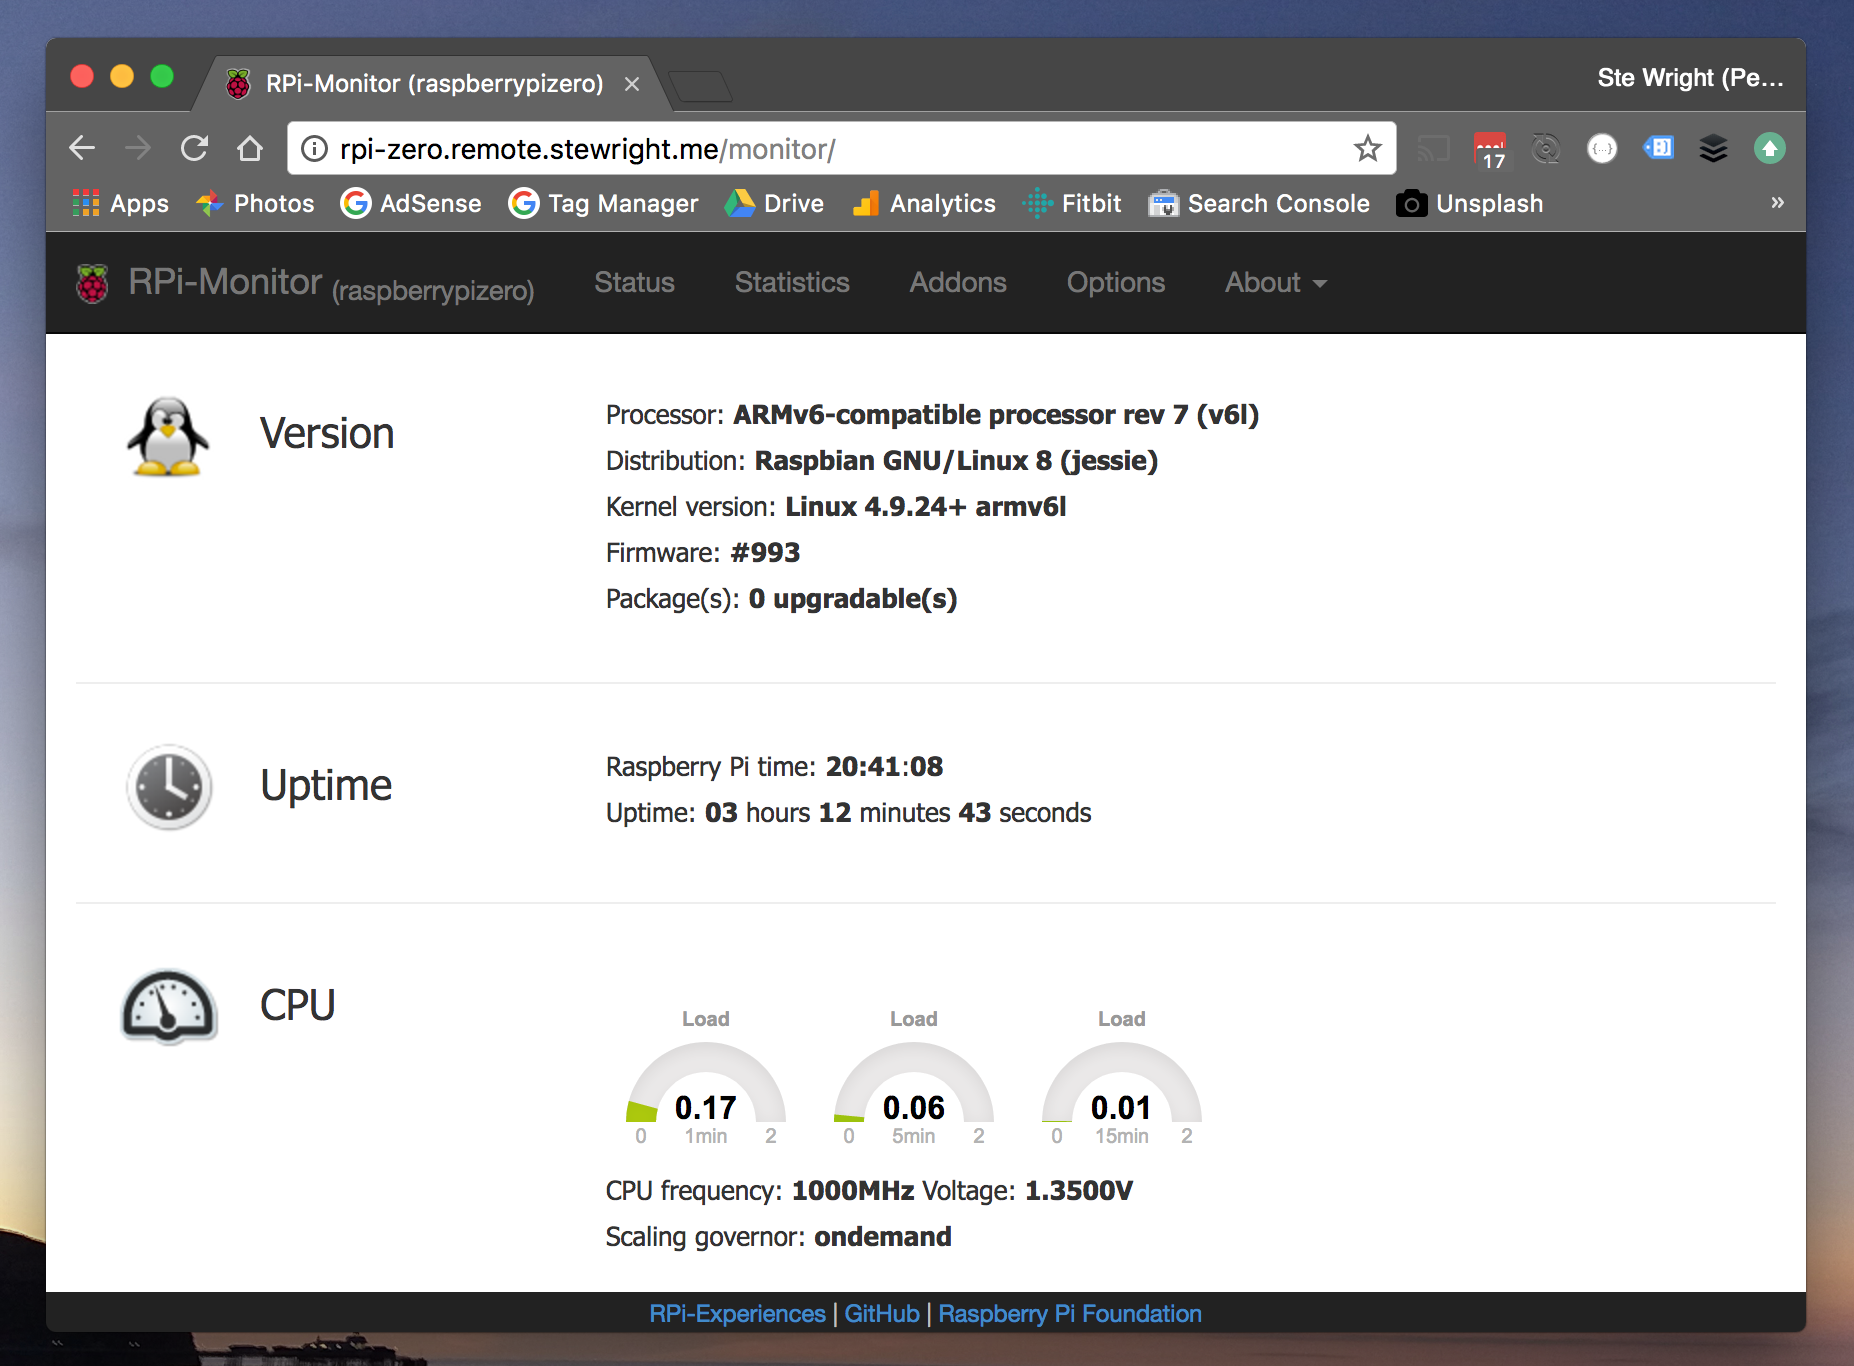
In your browser, visit your Raspberry Pi Zero’s IP address and append /monitor/ to the URL. You should see something like this:

Conclusion
We’ve got our solar-powered, completely off-grid Raspberry Pi Zero, installed Nginx and Rpi-Monitor. It’s a truly portable device that can be used for many many different applications. How long the device can run off battery remains to be established. Below is an iframe of the actual monitoring page on my battery operated Raspberry Pi Zero. As always, any questions or feedback, feel free to add a comment and click a banner if you found this tutorial to be beneficial.
Following the publishing of this article, I’ve had two comments and an email sent to me criticising me for asking people to click a banner if they found this to be beneficial. The banner adverts contribute towards the cost of the equipment I buy to write up tutorials like this but don’t come close to covering the full costs.

