How to overclock Raspberry Pi 4
In this tutorial, I'm going to experiment with overclocking a Raspberry Pi 4 to 2GHz in order to use it for emulation of retro games. ⚠️ Try this at your own risk


⚠️ I'll start with a warning. Overclocking your Raspberry Pi may cause permanent damage and brick your Pi. You do so at your own discretion - I can't be held responsible for any damage caused by overclocking.
What and why is overclocking?
Overclocking works by increasing the voltage and clock speed of your CPU and GPU in order to squeeze theoretic maximum capabilities out of it. This, in turn generates heat which can kill your device.
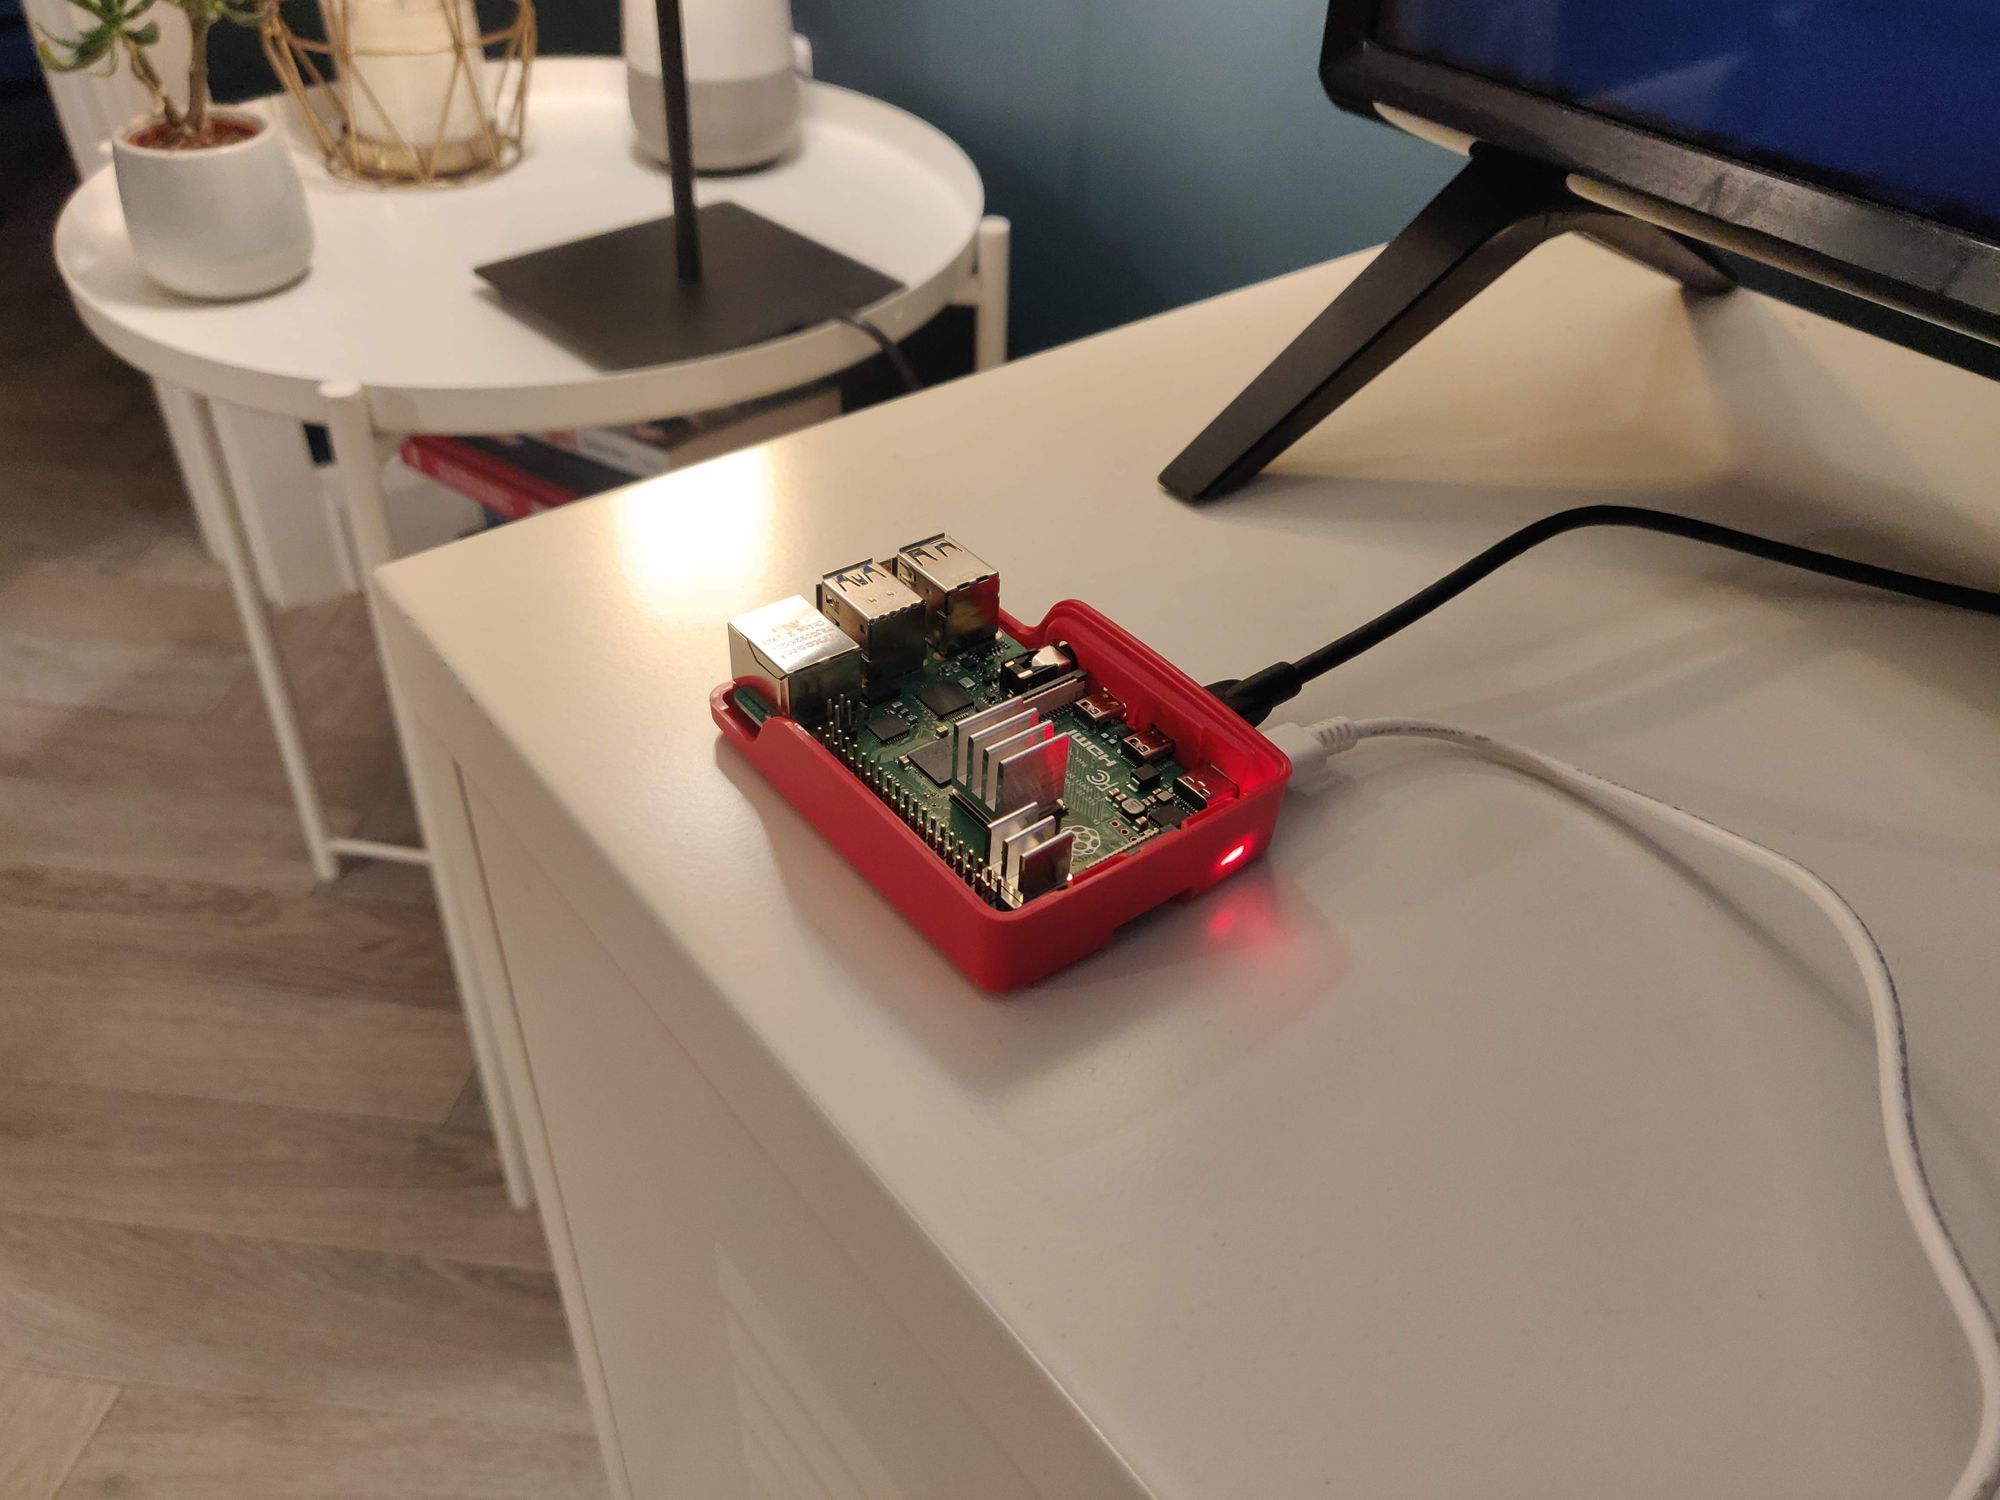
In this example, I've added additional heat sinks to my Raspberry Pi in order to try and dissipate as much heat as possible. To be honest, I really don't think the tiny heat sinks I've added are going to make the blind bit of difference, so chances are I'll bake a Raspberry Pi in order to make this tutorial!
Update! I've added proper cooling. Scroll to the bottom of the tutorial.
Prerequisits
The intention with this overclock is to emulate Dreamcast, N64 and possibly PSP on Raspberry Pi. As such, I've got RetroPie installed, but I believe the paths will be the same for Raspbian.
The overclock
Out of the box, here's how the Raspberry Pi 4 stacks up:
- 1.5GHz 64-bit quad-core CPU
- Broadcom VideoCore VI 500MHz GPU
I'm going to push mine to 2GHz on the CPU and 600MHz on the GPU. With my passive cooling solution, I'm really not expecting miracles.
Overclock Raspberry Pi 4 to 2GHz
Let's do this. In order to overclock, you need to be running the latest firmware and ensure you're all up-to-date. Launch a terminal and enter the following command:
sudo apt update -y && sudo apt upgrade -y && sudo apt install rpi-eeprom -y
This will do any updates/upgrades and update the firmware. Next, type the following command to edit the boot configuration:
sudo nano /boot/config.txt
This will launch Nano, an editor. At the end of the file, append the following text to clock yours to 2GHz on the CPU and 600MHz on the GPU:
# CPU overclock
over_voltage=4
arm_freq=2000

# GPU overclock
gpu_freq=600
Press ctrl + x to exit, choosing y to save as you do. Finally reboot your Raspberry Pi for that to take hold.
Theoretical Maximum - Overclock Raspberry Pi to 2.1GHz!
If you're feeling really adventurous, and have a sufficient cooling solution in place, let's push the GPU to 750MHz and the CPU to 2.1GHz.
⚠️ A word of warning, I tried this with just my heatskinks in place, it quickly overheated.
# CPU overclock
over_voltage=6
arm_freq=2147

#GPU overclock
gpu_freq=750
Monitoring the clock speed
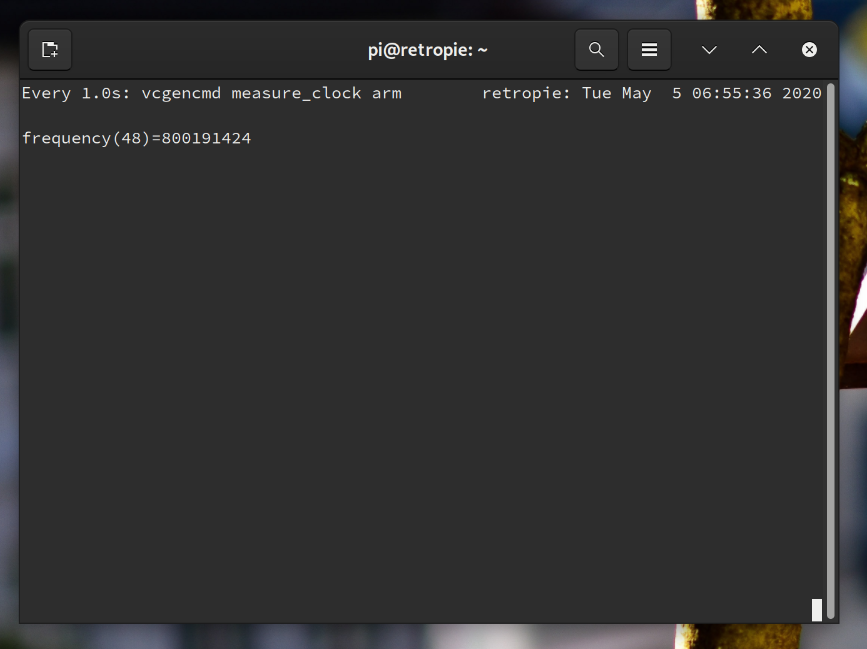
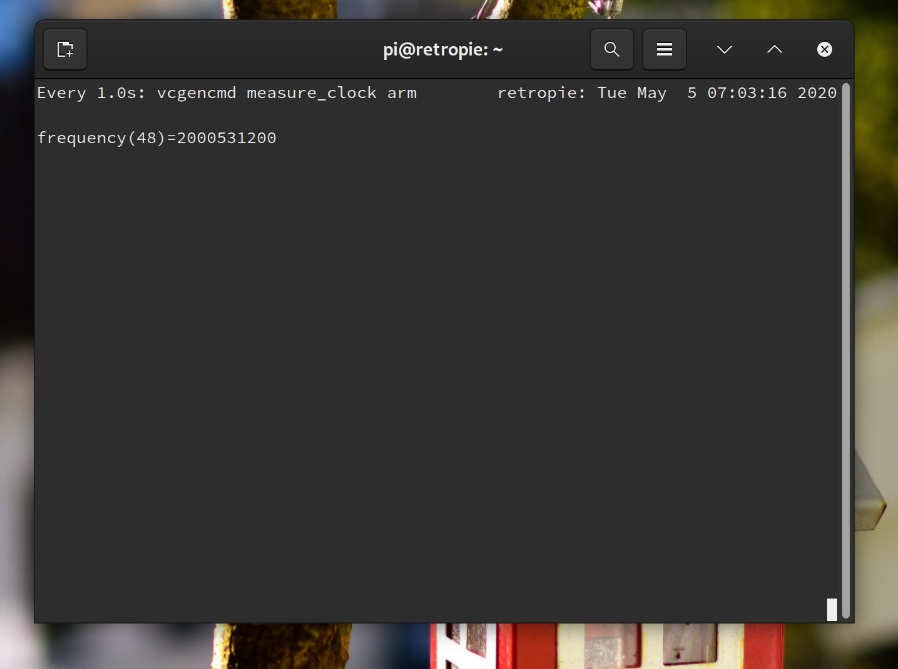
If like me, you're running RetroPie to push the clock speeds, SSH into your raspberry pi. If you're just running Raspbian, open a new terminal. Either way, monitor your clock speeds with this command:
watch -n 1 vcgencmd measure_clock armYou'll see the realtime CPU clock speed.
The clock speed will vary based on what cooling measures you have in place. The Raspberry Pi suffers from thermal throttling, where the unit will reduce the clock speed in an attempt to lower the temperature. Once it reaches safe levels, it opens up the clock once more
The issue with this is it makes the system perform poorly when playing games. You'll have bursts of clock and smooth gameplay, followed by clamped performance and choppy game play due to dropped frames.
Update - Improved cooling
After trying with some basic, cheap heat sinks, they simply were not up to the job. I instead opted for a GeeekPi cooler, which kept the Raspberry at a manageable 35°c. I did have to keep the case open as heat quickly accumulated during testing.

I tested by playing Sonic Adventures on a Dreamcast emulator. The gameplay was remarkably smooth throughout the experiment.
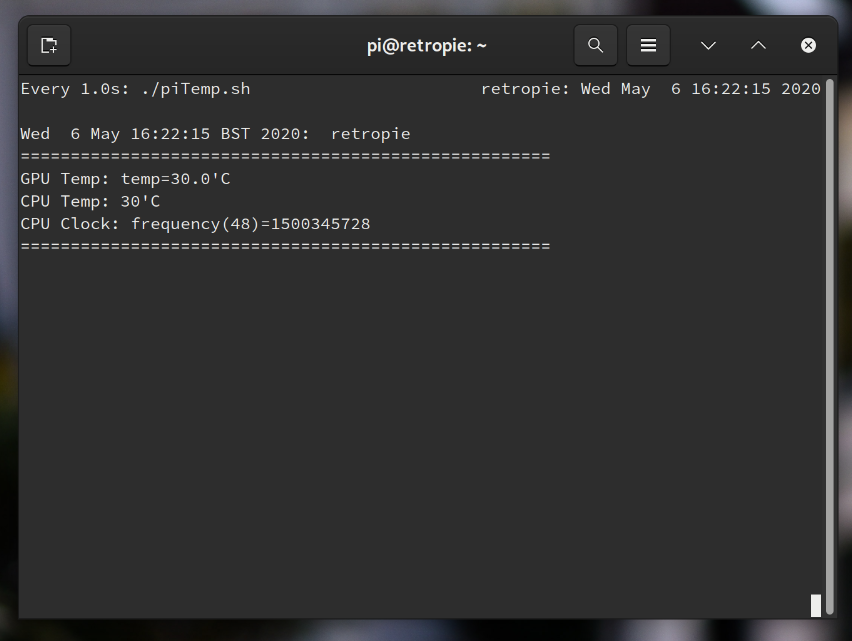
While at idle, the CPU and GPU maintained 30°c with the clock speed fluctuating between 800MHz and 1.5GHz.
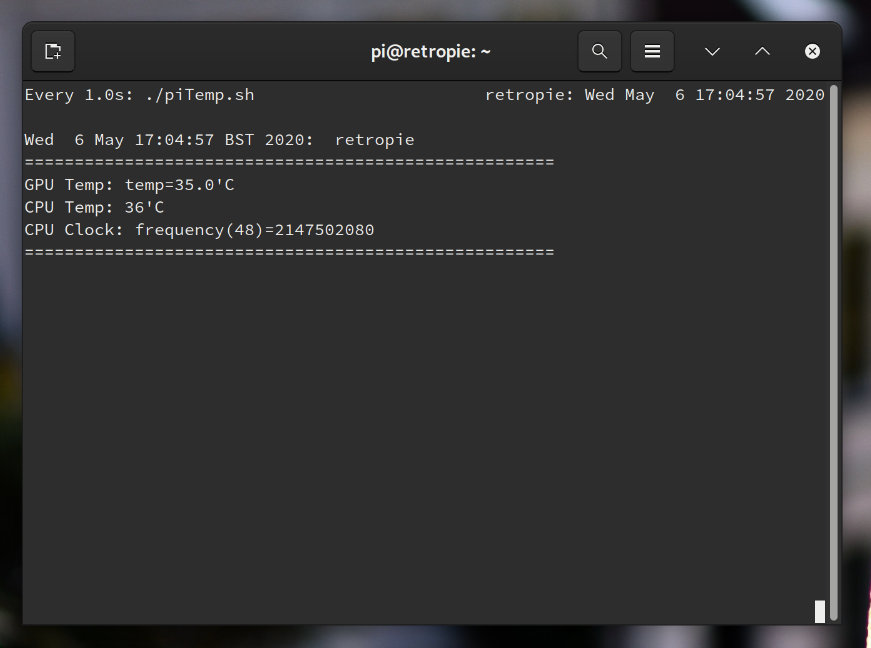
While during gameplay, the temperature stabilised at 35°c for the GPU and 36°c on the CPU, whilst still maintaining smooth gameplay. These could only be achieved with the case open.
Conclusion
I've got a more substantial heatsink, complete with in-built fan arriving over the next few days, so I'll update the tutorial with new findings once I've tried it out. With the Geekpi Raspberry Pi 4 heatsink with built-in fan, I was able to overclock the GPU to 750MHz and the CPU to 2.1GHz. This overclock was stable with no crashes. I achieved smooth emulation on N64 and Dreamcast.