Create a Raspberry Pi VPN Server using OpenVPN
In this tutorial, I will guide you through the steps to turn your Raspberry Pi into a VPN server using L2TP/IPsec


There's many reasons why you'd want to install a VPN on your Raspberry Pi. OpenVPN offers a proven solution to allow you to connect to your home network from anywhere in the world.
I've previously written a tutorial on how to install a L2TP/IPsec VPN server on your Raspberry Pi, check out that tutorial if you don't want to use OpenVPN.
I strongly recommend using ethernet to connect your Raspberry Pi to your network rather than ethernet. Also, if you're not on a fixed IP address, I'd recommend following my tutorial to set up Dynamic DNS so you can connect to your VPN via a hostname instead of an IP address.
Suggested first steps
Follow my tutorial on installing Pi-Hole on your Raspberry Pi. This will allow you to block ads when you're connected to your VPN. This step is not required.
What is a VPN?
A Virtual Private Network (or VPN for short) is a method of connecting and behaving like a node on one network from another. For example, on your home network, you may have a wireless printer or a NAS on your network which you won't be able to access externally.
By adding a VPN server to your home network, you can connect to it and gain access to all the resources on your home network from external ones, like if you are in a coffee shop with Wi-Fi.
Step 1 - Let's install some packages
Lucky for us, the good folks over at The PiVPN project have made the process incredibly easy for us. Let's start by running this command which will launch their installer:
curl -L https://install.pivpn.io | bashAll being well, you should see the installer. Go ahead and press enter to continue.
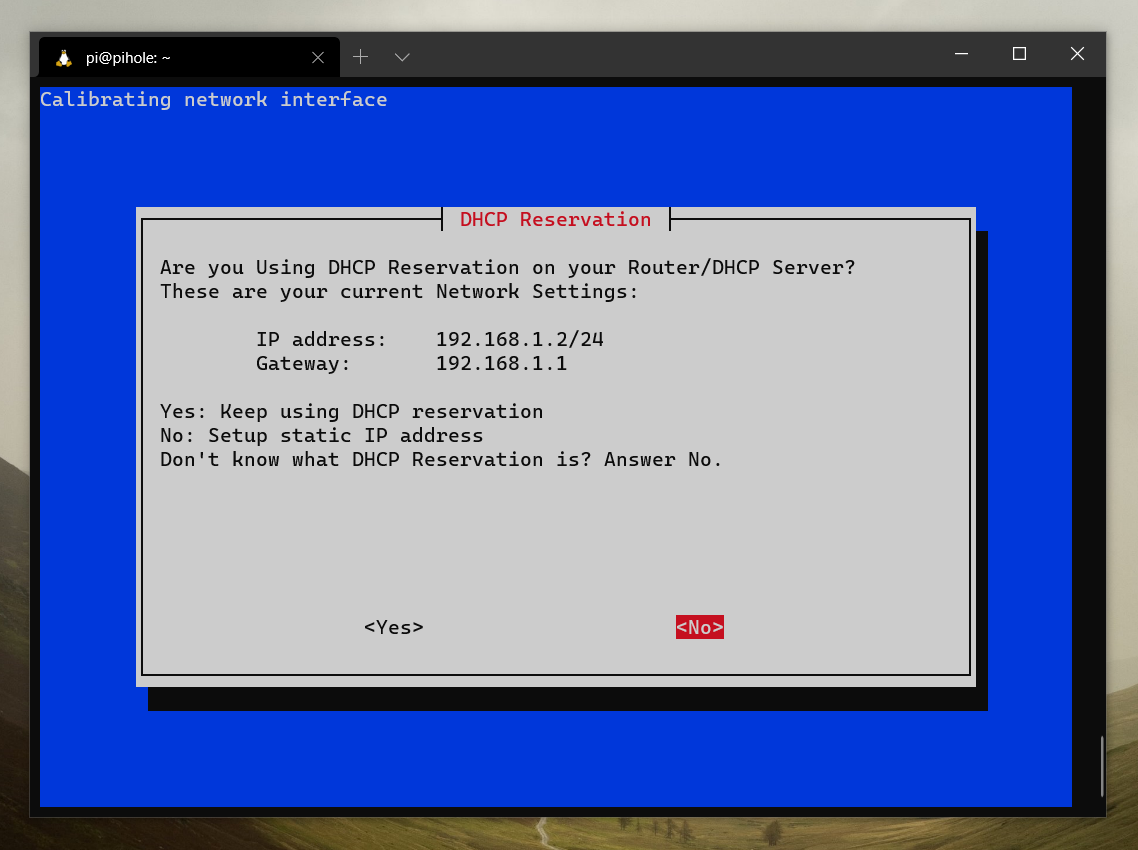
During the installation process, it will ask you a number of questions in order to set your Raspberry Pi up correctly. The first is Static IP or DHCP. In most cases, you should opt for Static IP and assign the one which the DHCP server has given you as you know this one is free. Make a note of your gateway and IP as you will need these after selecting No:
Next, you will be asked to choose a local user to hold VPN configurations. Choose pi for this. Unless you add your own users, you will probably only have one user.
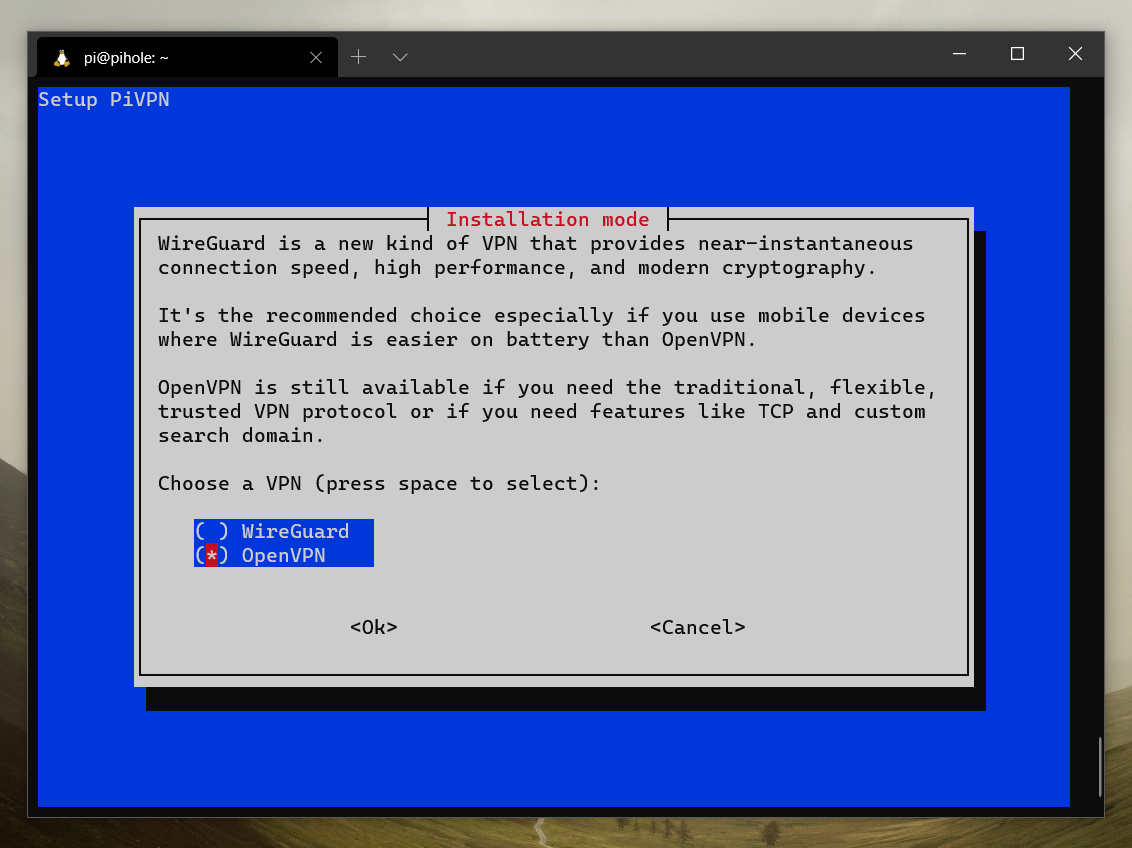
After this, you will be asked which VPN to install. As this is a OpenVPN tutorial, we'll choose OpenVPN here and hit space to select it. Then press enter to continue:
After this, it will ask you if you want to change any of the default options. I've chosen 'yes' as I want to use Pi Hole with my installation. Choose no to continue with the defaults.
The installation process will now commence. It will ask you a number of configuration questions. Skip each if you are not asked.
Protocol selection
When asked which protocol to use, choose udp. TCP offers better error correction and connection reliability, but these features come at a trade-off, in this case it's speed. Not ideal for VPN traffic on a Raspberry Pi, so we choose UDP.
Port selection
It will ask you if you want to change the default port number from 1194 to something else. You can change this if you want, to add some security through obscurity, but I'm sticking to the default.
Ad-blocking - Optional step
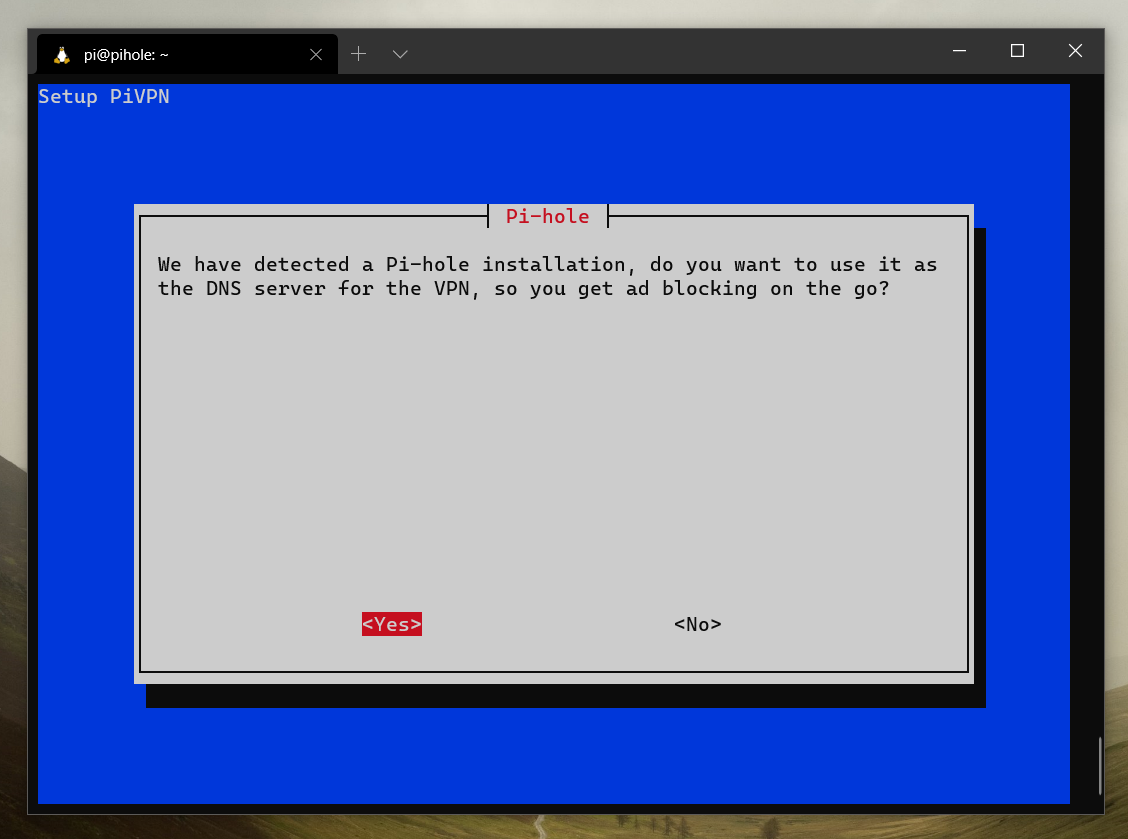
If, like me, you have Pi Hole installed, it will ask you if you wish to use Pi hole to block ads when connected to your VPN. Otherwise, it will use the DNS server provided by your router. Choose 'yes' to enable ad-blocking on the go:
Custom search domains
Under most circumstances, you will not use custom search domains, go with the default option of 'no'.
Public IP or DNS
If you have a static IP address and you're fine using this to connect to your VPN, choose 'IP'. Choose 'DNS' if you have a domain pointed to your IP address.
Alternatively, if you are on a home broadband package and have a dynamic IP address, I suggest following my Dynamic DNS tutorial so you can point a hostname to your network and choose 'DNS'.
Installation mode
It will ask you if you want to use a feature of OpenVPN 2.4 called 'Elliptic Curves'. This will improve reliability and speed, so go ahead and choose this option. You will need to ensure your OpenVPN client supports this, but as I'm assuming you'll be using OpenVPN's client on your phone or computer, we'll choose this option.
ECDSA certificate size
Choose 256 bit here, unless you're requiring extra security. Just know, there is a performance hit with higher levels of encryption.
Unattended upgrades
You will see the following prompt:
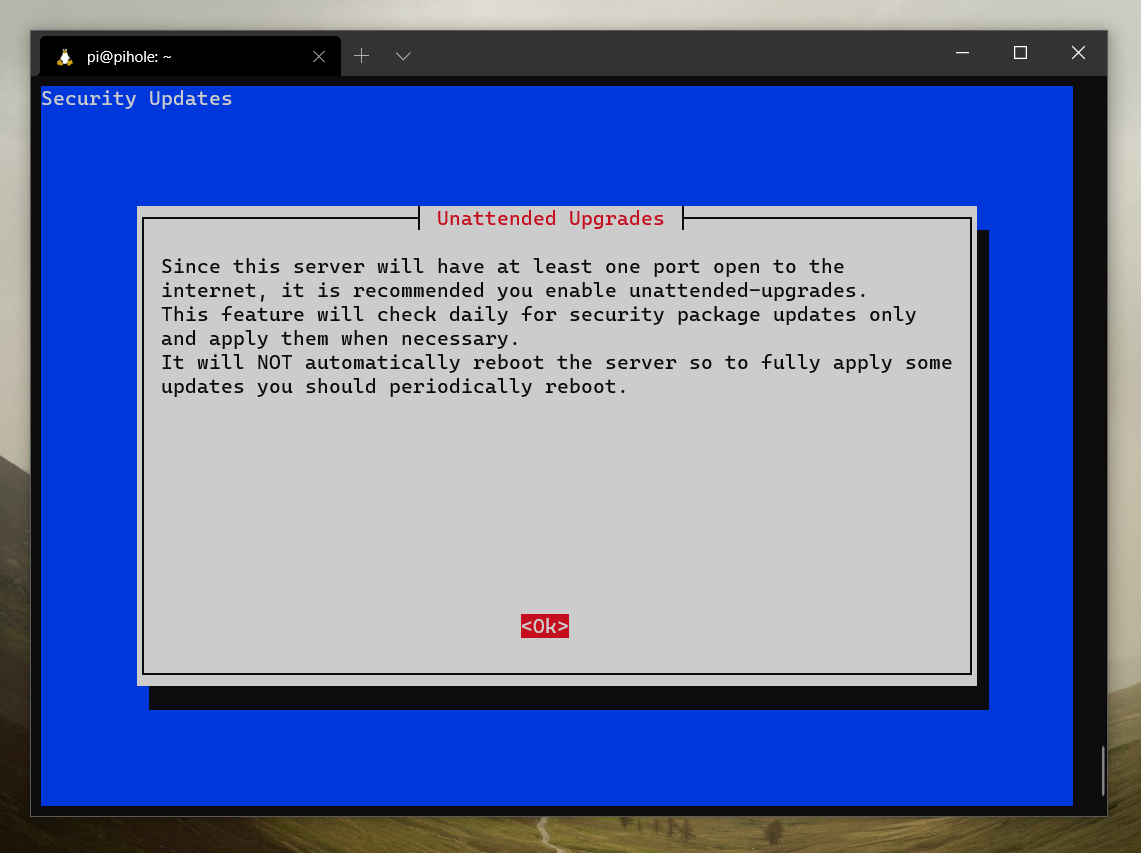
Under almost all circumstances, you will want this option to ensure top security. Choose yes after seeing this prompt. The installation will now commence.
Step 2 - Adding VPN users
After we have restarted after installing OpenVPN, we want to add some users to allow us to connect. From the Raspberry Pi, run this command:
pivpn addThis is an interactive command which will ask for a client name. Choose an appropriate one. It could be the name of the device you're connecting from or your name.
Next, it will ask how long you want the client certificate to last. Go with the default of 1080 days, we can run the command again if it expires. Finally it will ask for a passphrase. Enter and confirm this.
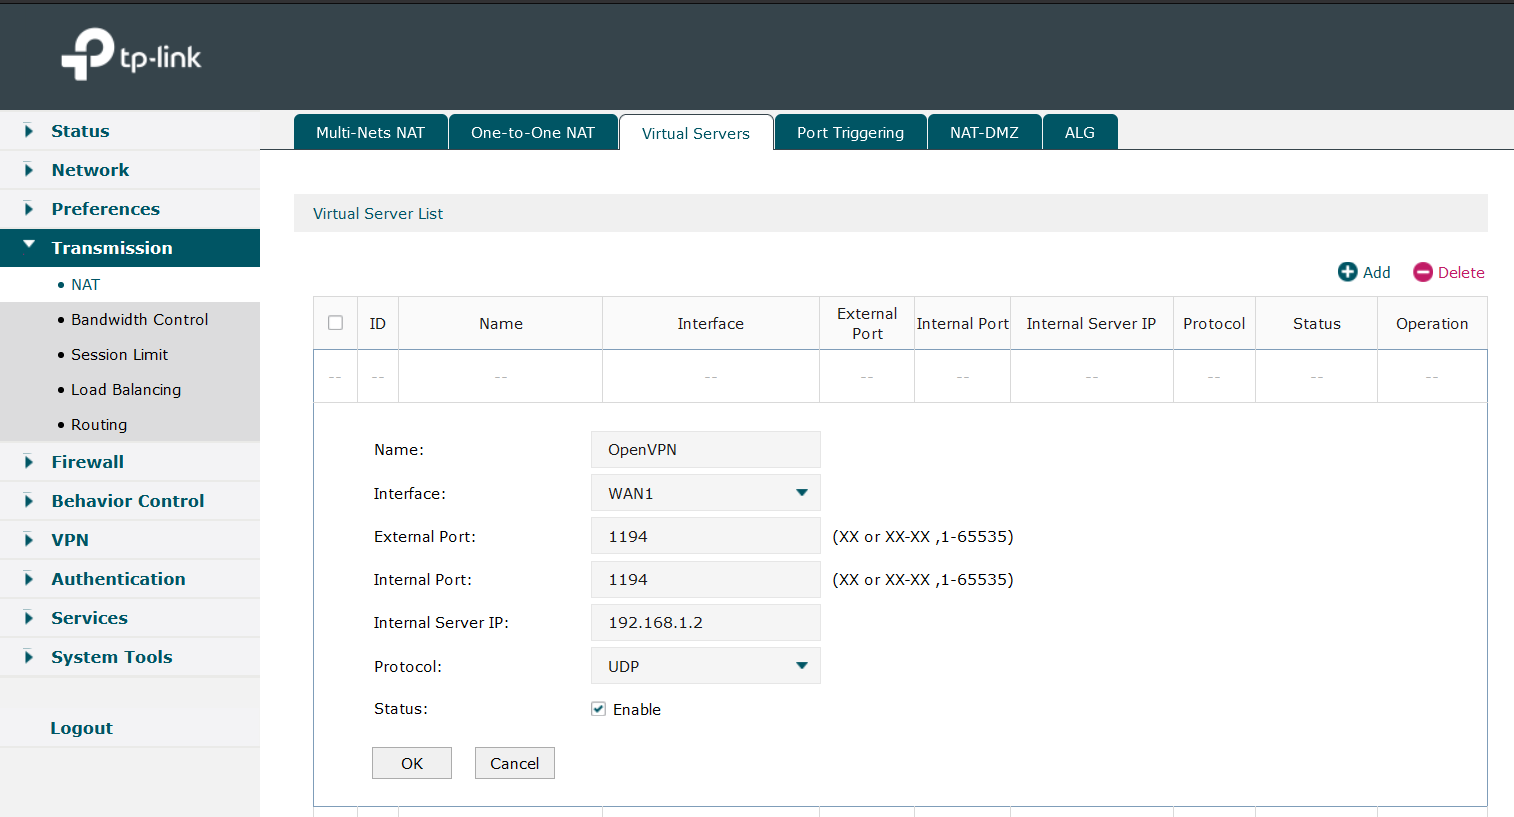
Step 3 - Configure your router
Next we will need to forward the port we chose to use for OpenVPN to our Raspberry Pi's IP address. This will vary from router to router, here's my router's port forwarding pointing port 1194 over udp to my Raspberry Pi's IP 192.168.1.2 :
Step - Configure your client
On each device you use to connect to your VPN, you will need to install a client to enable you to connect. If you're using iOS, search the App Store for 'OpenVPN'. If you're on Android, head to the Google Play store and search there for OpenVPN.
Linux users using Gnome will already have the client built-in, so configure this through your network settings. For windows or mac, choose one of the following:
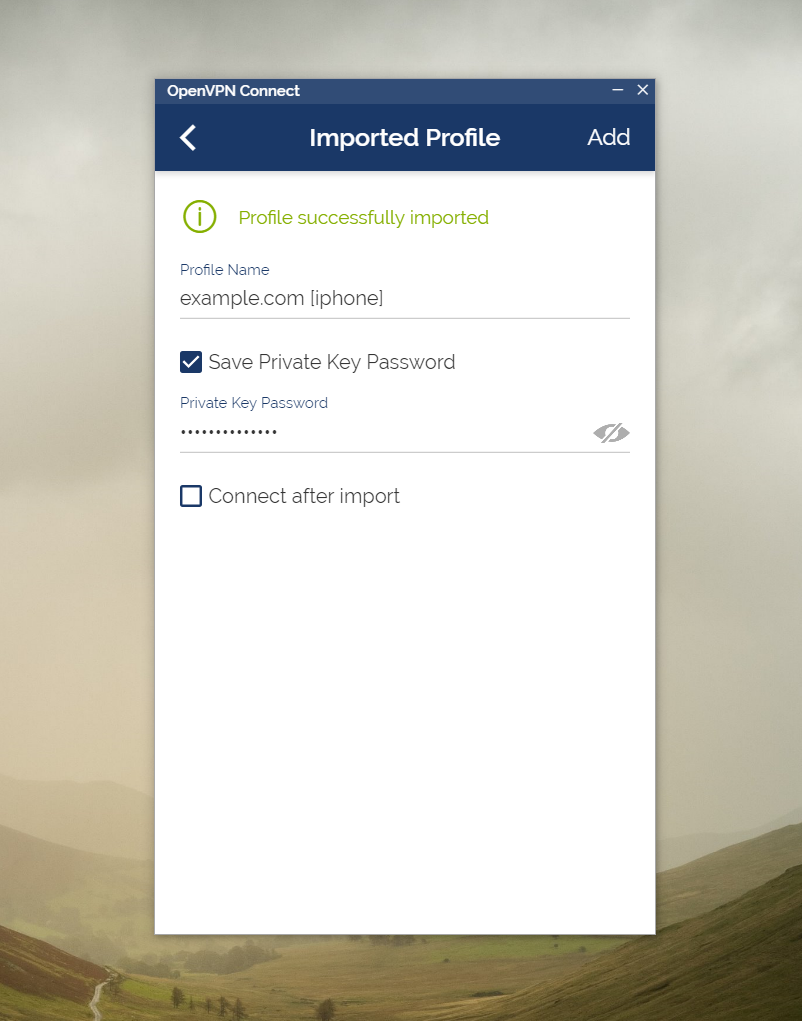
The easiest way to configure your client is to use a OVPN profile. You can obtain yours from your Raspberry Pi. Say we created a client called 'iphone' in step 2, we could run this command to see our OVPN profile:
cat /home/pi/ovpns/iphone.ovpnSave the output of cat to a text file called 'iphone.ovpn' to use it with the client.
Try tethering to your phone and connecting.
Conclusion
We've configured and installed our OpenVPN server. We can now use this on all our devices to send our traffic over our home network. Any questions, feel free to ask below.