How to point a domain to a dynamic IP address
Most ISPs, certainly in the UK provide dynamic IP addresses which regularly change. Learn how to point a domain to a dynamic IP in this tutorial.

This is something I've been asked about time and time again in the past, I've been meaning to write this tutorial for a while so hopefully it will help some of you out.
How domains and DNS work
Before I discuss domains and DNS, let's use an analogy. A domain is purely an identifier for one or more services. Think of it as being like a car registration plate. The plate identifies a car, a van, a lorry, a motorbike. It can (at least in the UK) be transferred from one vehicle to another. It is an identifier for a thing.
Similarly, a domain is an identifier which points to a DNS server. A DNS server holds a number of records to route a request to a given service that the DNS server knows about.
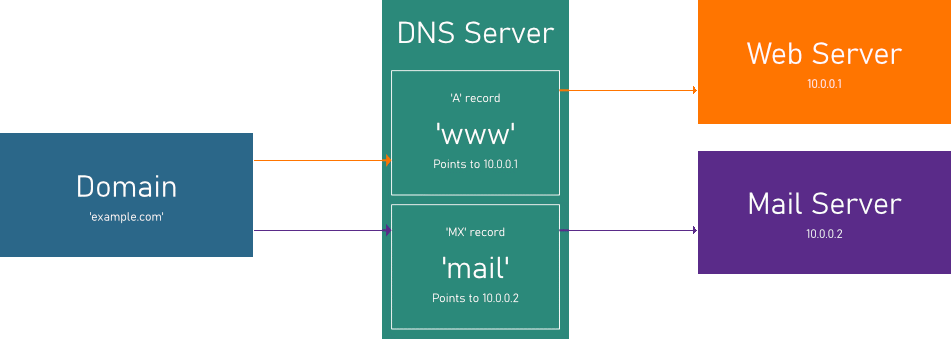
Let's take a look at the above example. In this example, our domain is 'example.com'. We have two services, one is a mail server and another is a web server. Each has their own fixed IP address. When a user makes a request to 'www.example.com', the request routes to the web server via an 'A' record for 'www'.
We also have a Mail Exchange record, or 'MX' record. In this case, when someone sends an email to our domain, it's routed to the mail server via the 'mail.example.com' MX record.
There are many other types of record, but in this tutorial, we will only look a Address (A) records and Canonical (CNAME) records. A CNAME record points a subdomain to another DNS server's resource.
There are many advantages to pointing a domain to our home network. For example if you followed my tutorial on how to set up a VPN on a Raspberry Pi, you would need to follow this tutorial in order to connect using a hostname instead of an IP address.
What is a Dynamic IP address?
Certainly in the UK, most domestic ISPs will assign your home router a random IP address out of a pool of IP addresses that the given ISP has access to. This can change after a fixed period of time set by the ISP or after you restart your router.
The issue is, if we want to point a domain to a web server on our home network, we would need to update the 'A' record each and every time the IP address changes. This isn't idea, but there are solutions.
What is Dynamic DNS?
Dynamic DNS is a term given to technologies which allows us to point a domain to a dynamic IP address. It works by your router (or any computer on your network) telling the Dynamic DNS service that your IP address has changed, and the Dynamic IP address in turn, points its DNS records to that new IP address.
That's a very basic top-level explanation of all the things we need to know for this tutorial.
Step 1 - Register for a Dynamic DNS service
There are many Dynamic DNS services. For this tutorial, I'm going to use NoIP as the example service as it's one I'm familiar with, and they provide a free tier.
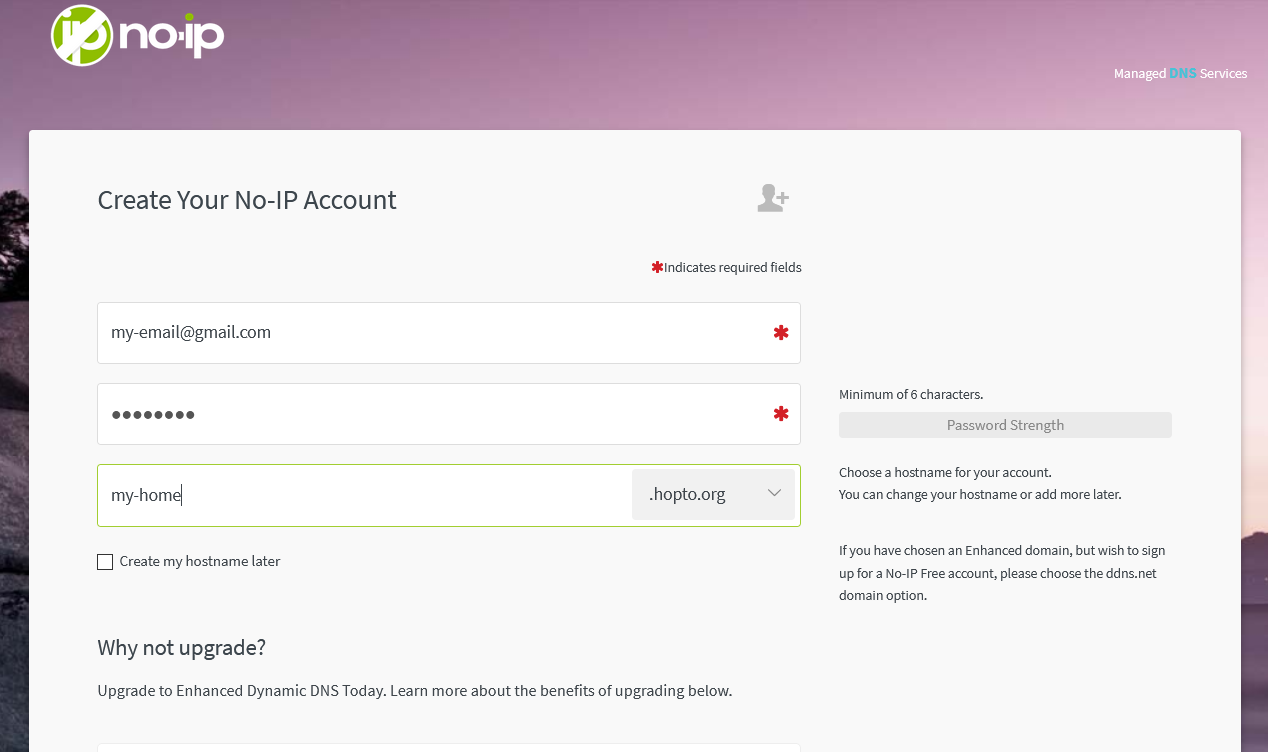
Head to NoIP and register a free account. During the registration process, it asks you to enter a hostname. This is what we're going to use to point our domain to our home network. Choose a subdomain which you will remember and choose one of the provided domains. In this example, I'm using my-home with the domain hopto.org which means my full hostname is my-home.hopto.org.
The registration will ask you if you wish to use your current IP address for your hostname, just accept this if you're on the network you wish to point the domain to.
Step 2 - Set up the update service
Almost all domestic routers allow you to define Dynamic DNS services. These may be called 'DDNS' on your router. Login to your router's admin panel and look out for 'DDNS' or 'Dynamic DNS'.
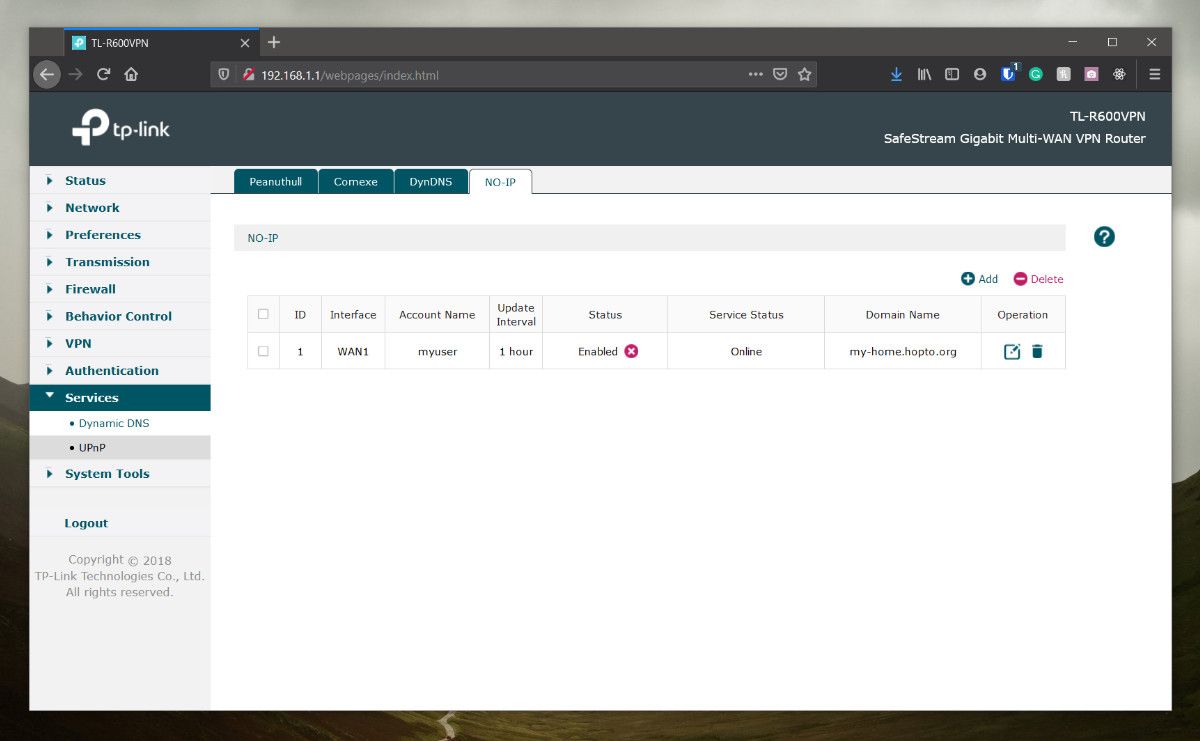
The screenshot above shows DDNS settings on my router. You will need to tell your router 4 things:
- The service you're using, in this example it's No-IP.
- Your username
- Your password
- Your hostname, in this example, 'my-home.hopto.org'.
That's it, your router should now tell No-IP every time its IP address changes and it'll be updated accordingly.
Step 3 - Point a registered domain to your dynamic IP (optional)
The title is slightly misleading as we're not pointing our registered domain as such to our dynamic IP, rather we will be adding a CNAME record to our registered domain to point to our No-IP hostname.
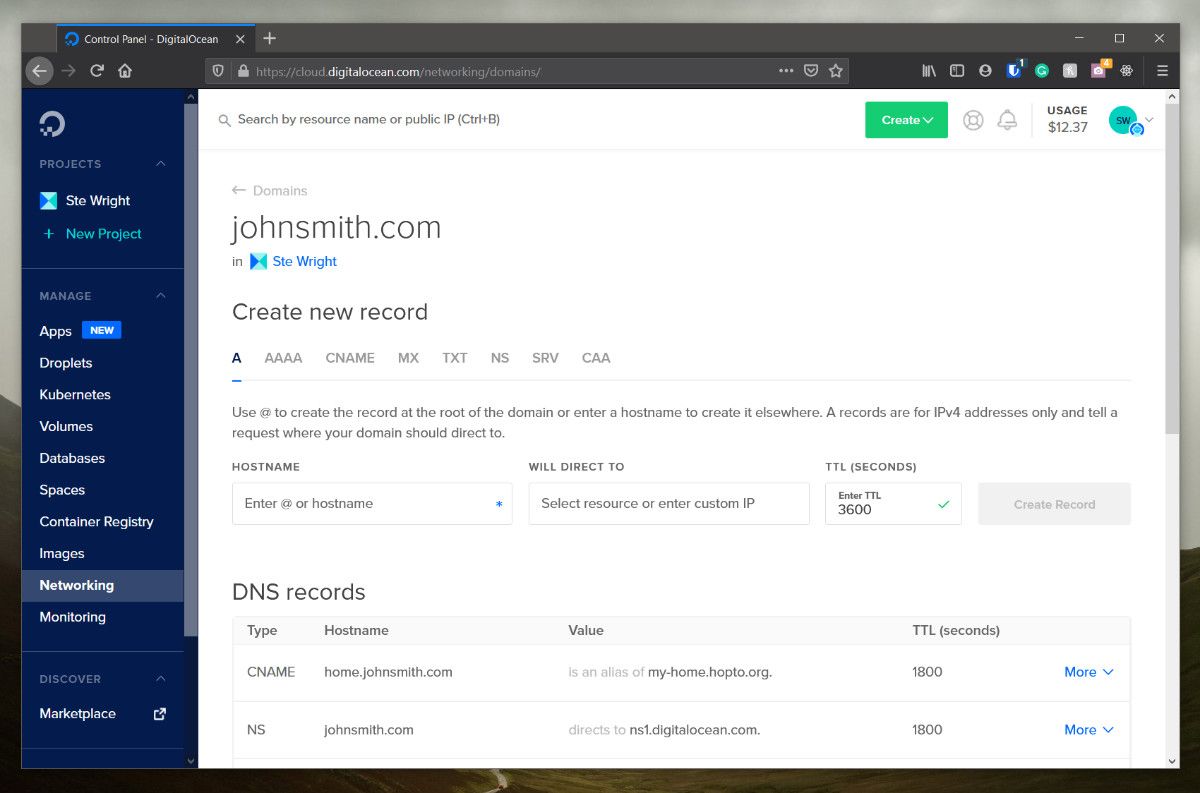
Let's say we own the domain 'johnsmith.com' and we want to create a subdomain called 'home' to point to our home network.
From your DNS management interface for 'johnsmith.com', go ahead and add a new CNAME record for 'home' which points to our No-IP hostname:
Conclusion
We've now registered for a Dynamic DNS service, configured our router to keep it updated and now can access our network externally, either using the hostname from our Dynamic DNS provider, or optionally via a subdomain on a registered domain.