Install Ghost CMS on a Raspberry Pi
In this tutorial, I'll guide you through installing the Ghost CMS on a Raspberry Pi.

In this tutorial, I'll guide you through setting up Ghost CMS on a Raspberry Pi. I'll assume that you're familiar with the command line and you've got the latest version of Raspbian OS installed.
What is Ghost?
Ghost is a really light weight blogging CMS. It was devised due to the founder's frustration with the increasingly bloated WordPress CMS. Ghost is written in Javascript unlike WordPress, which is written (badly) in PHP.
This website was ported from WordPress to Ghost. What you see now is the default Ghost theme.
Step 1 - Let's get up-to-date and install required packages
First, we need to add a new package source to ensure we're using the most up-to-date version of node:
curl -sL https://deb.nodesource.com/setup_12.x | sudo -E bash
Before we start, let's make sure we're up-to-date with all the system updates.
sudo apt update -y && sudo apt upgrade -y
Ghost runs as a service, and uses a web server such as Apache or Nginx to proxy through. It also requires a database. In this tutorial, we'll be using MariaDB as the database server and Nginx as the web server. Install these with the following command:
sudo apt install nginx mariadb-server nodejs -y
Next, let's globally install ghost:
sudo npm install ghost-cli@latest -g
Step 2 - Configure MariaDB
Next, we need to change the default root password to something more secure. Stop the database server:
sudo service mariadb stop
Restart the server in safe mode:
sudo mysqld_safe --skip-networking &
Once the service restarts, you'll need to login to MariaDB:
sudo mariadb -u root
You should now be logged in. You should see this:

Before we set the password, we need to reload the grant tables using this command:
FLUSH PRIVILEGES;
Next set your password for the root user, changing my_root_password for one of your choice:
ALTER USER 'root'@'localhost' IDENTIFIED BY 'my_new_password';
Once you've done this, flush privileges again:
FLUSH PRIVILEGES;
Now exit out of MariaDB:
exit
Normally, we'd restore the session using 'fg' and quit out of mysqld_safe and press CTRL + C to kill the process. For whatever reason, in the current version of Raspbian, I couldn't do this. Just restart your Pi instead:
sudo reboot
Step 3 - Create a database and database user for Ghost
We'll need to login to MariaDB using our newly created password:
mariadb -uroot -p
You should be asked to enter your password at this point. Once you're logged in, you'll be able to start creating the new database. Enter the following command to create the database:
CREATE DATABASE ghost_cms;
Now, let's create a new user for ghost. We'll also call the user ghost_cms. Change my_password for one of your choice. Bear in mind, we don't need to remember this password long term, so make it secure. Make sure you make a record of it for the time being:
CREATE USER 'ghost_cms'@'localhost' IDENTIFIED BY 'my_password';Finally, we need to grant our new permissions for our new user on our new database:
GRANT ALL PRIVILEGES ON ghost_cms.* TO 'ghost_cms'@'localhost';
Finally, flush the privileges:
FLUSH PRIVILEGES;
Exit out of MariaDB:
exit
Step 4 - Creating a system user for Ghost
First we'll create a new user to administer ghost from. We can't use 'ghost' for this, as it conflicts with the user which Ghost runs under. I use 'www-ghost'.
sudo useradd www-ghost
Next we'll add our new user to the sudoers list:
sudo usermod -aG sudo www-ghost
Next, let's create a home directory for our new user and assign it the correct permissions:
mkdir /home/www-ghost && chown www-ghost:www-ghost /home/www-ghost
Finally, let's create a password for our new user:
sudo passwd www-ghost
You'll be asked for the new password, and to confirm it.
Step 5 - Set Ghost up
We'll install ghost to a directory called 'ghost' in our web root. You can change the directory name if you wish:
sudo mkdir -p /var/www/ghost
We'll set the owner of the directory to our ghost user, set the correct permissions and change to the directory:
sudo chown www-ghost:www-ghost /var/www/ghost && sudo chmod 775 /var/www/ghost && cd /var/www/ghost
Let's switch to our newly created Ghost user:
sudo su www-ghost
Now, let's install ghost:
ghost install
You'll see a message about compatibility. Hit 'y' to continue.
The installation will now begin. It's an interactive installer, so you'll be asked to provide some details. This will take a while depending on the speed of your SD card, so hold tight.
You should now be asked to input some settings:

When asked to enter a blog URL, enter http://localhost for the time being. By setting this, the Ghost installer will configure the Nginx setting for us.
You'll be asked for some more settings, here's a summary of what you should enter:
- blog URL:
http://localhost - MySQL hostname:
localhost - MySQL username:
ghost_cms - MySQL password: Whatever password you chose when making the user in MariaDB
- Ghost database name:
ghost_cms - Do you wish to set up Nginx?:
y - Do you wish to set up SSL?:
n - Do you wish to set up Systemd?:
y
Here's a recap of my settings to this point:

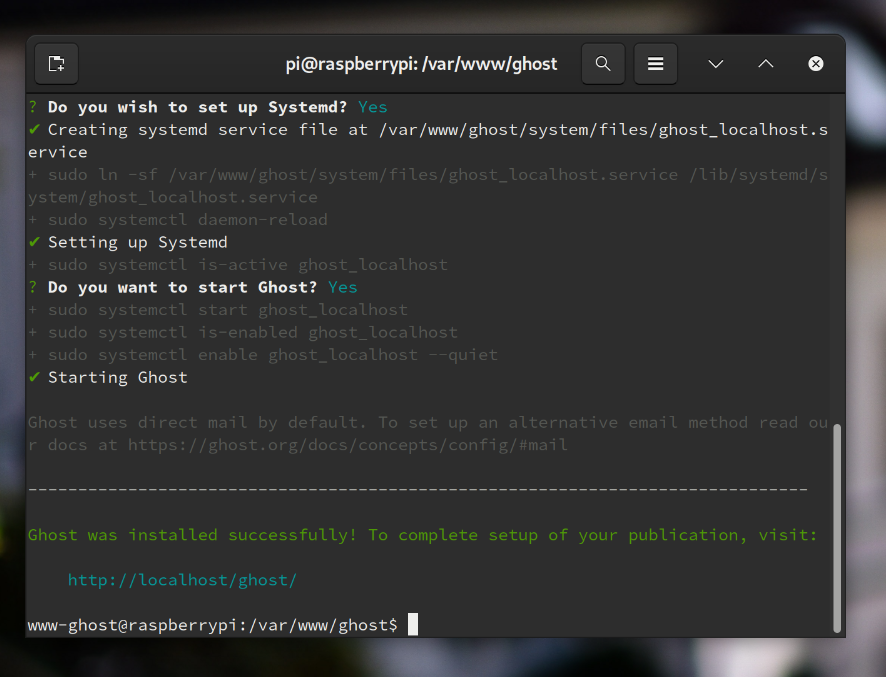
You'll be asked if you want to set up nginx, choose 'y' for this, when asked about setting up SSL choose 'n' and finally when asked about systemd choose 'y' again.
Systemd is the system daemon manager and will automatically start the Ghost instance when the Raspberry Pi restarts, or if Node crashes.
Once setup has completed, you'll see the following:

Finally, we need to get rid of the default configuration for Nginx and restart the service. This can be done with this command:
sudo rm /etc/nginx/sites-available/default && sudo service nginx restart
Let's give it a go!
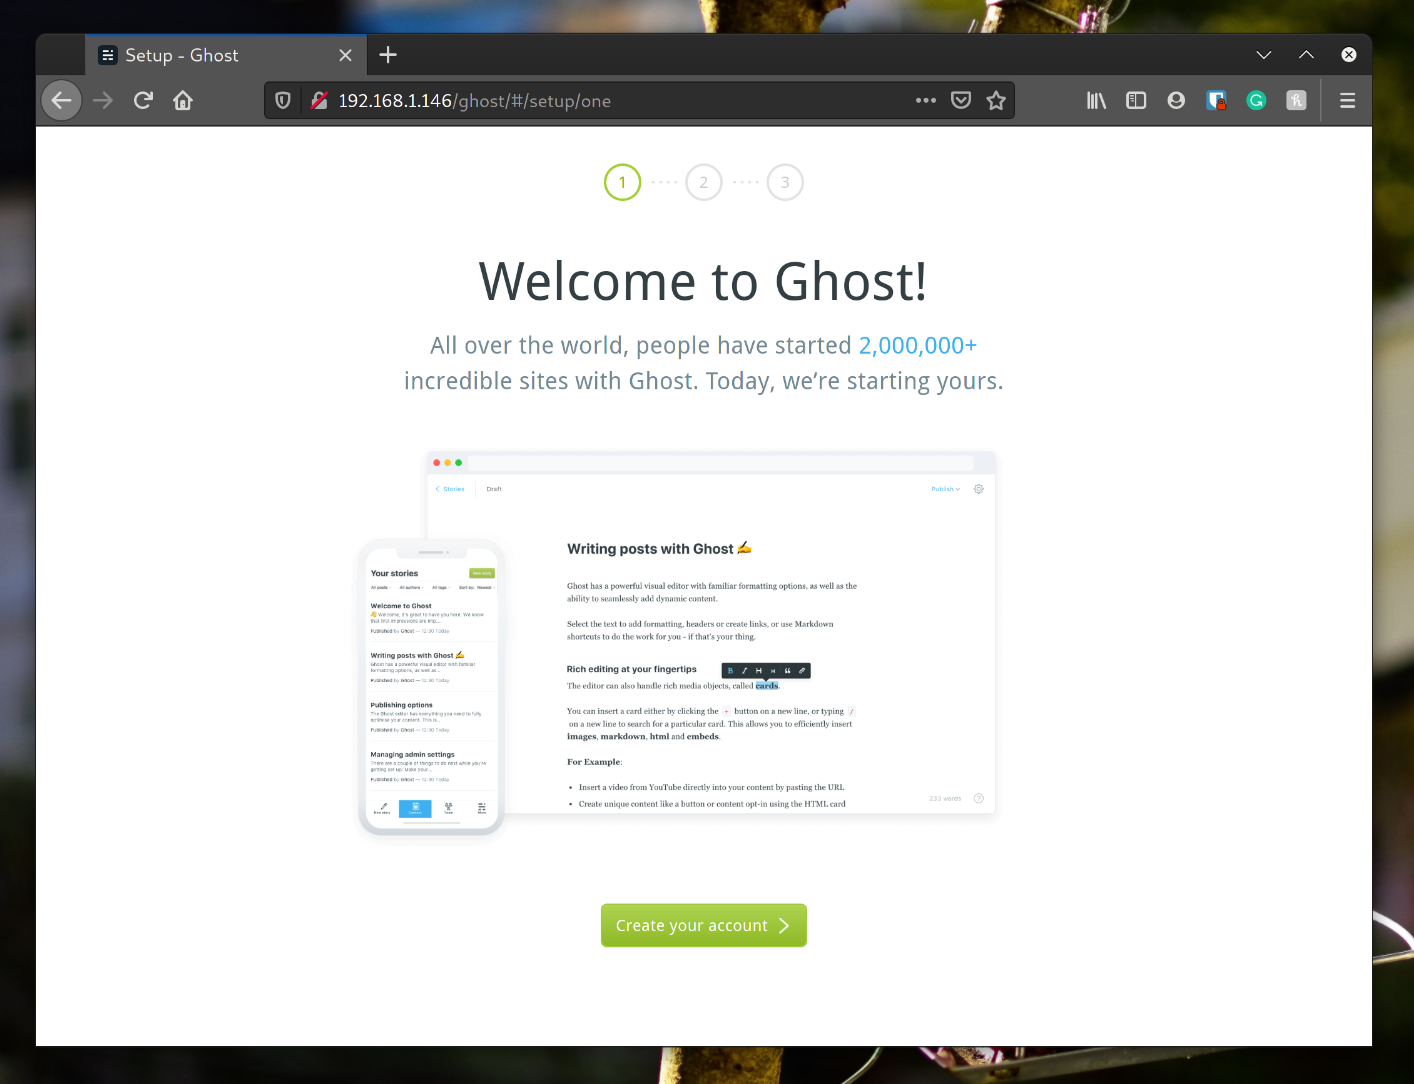
You're done. You can now manage your blog from your browser. If you're on your Raspberry Pi, simply visit http://localhost/ghost. You will now be left to set things up:

Recap
We've successfully got Ghost CMS running on a Raspberry Pi. These little machines are more than capable of running Ghost CMS. In my tutorial, I installed on a Raspberry Pi 3 Model B which has more than enough power to run Ghost. It will run without any issues on a Raspberry Pi 2 and 4 as well.

